Pages

Tuesday 23 October 2012

Tag Tutorial - PTU - Bones and Beauty


SUPPLIES NEEDED

Tube - I'm using a beautiful and haunting one by
Jasmine Becket-Griffith, licensed via Creative Design Outlet(CDO)
If you'd like to use the same tube in your tag, you can purchase it HERE

Scrapkit I'm using a fab Inspired By mini-kit that was made to compliment the same tube. It's by my friend, Chichi
and it's also available from the CDO site HERE

You can - of course - use a tube and scrapkit of your choice

Mask - one of mine called Big Mask 19 which you can get HERE

Mura Meister Copies

Xero Graphics Greytinter

Font of your choice


____________

Open a New Image in PSP

700 x 600

FF White


Copy and Paste your chosen tube


Then

Open - Frame

Image, Resize 40%

C&P


Duplicate the tube layer

Hide the main copy for now

and

Position the duplicate within the frame area as liked

and then

Click inside with Magic Wand to activate the frame inner

Selections, Modify, Expand by 4

Selections Invert

And hit Delete on the tube layer

Make sure this is below the frame layer in the LP

Now, duplicate this selected tube layer

and on the top one, Adjust, Blur, Gaussian Blur, 2.00

and change the Blend Mode to Overlay

and on the bottom tube layer

Xero Graphics - Greytinter on Overall Tint slider at 100

Apply

Open one of the Papers you'd like, position within the frame inner area

and repeat the Selection Invert Delete process for the paper layer

and now the blurred tube layer too

Make sure this paper layer is below the frame and tube area layers

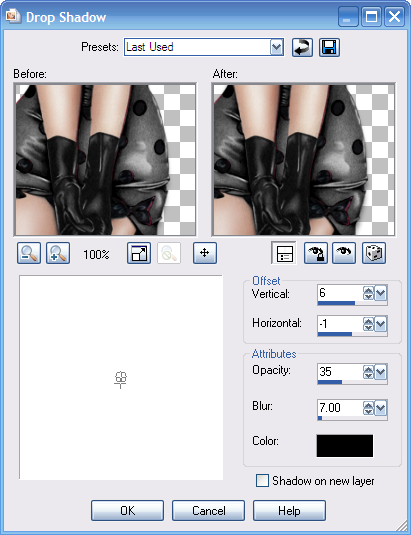
and finally add a subtle dropshadow of choice to the frame layer

I used 2, 0, 33, 5.00, Black


Now, making sure that the Main tube layer and the White Background are

hidden

Layers, Merge Visible

Unhide the White Background but keep the main tube layer hidden for the moment


So

Duplicate your frame layer
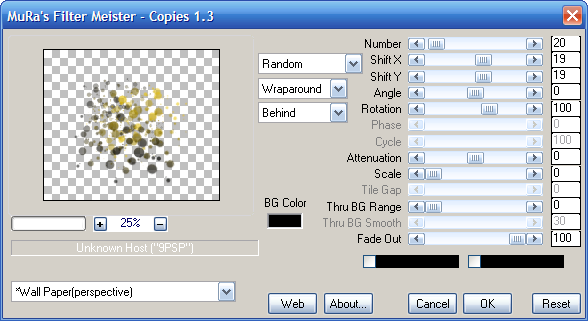
and on the top copy

Apply Mura Meister Copies on these settings of mine


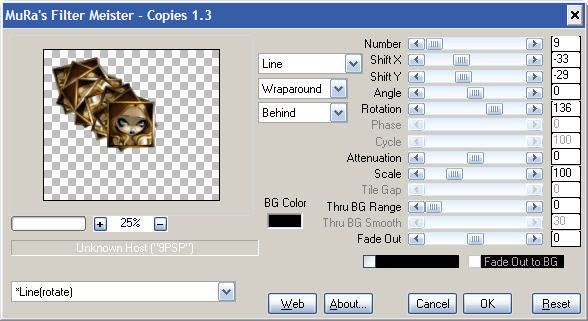
Now unhide the main tube and move up to the Top of the LP

and check for placement of your tube against mine

We want the Copies to compliment the tube position

so if yours doesn't - then undo, go back and jiggle the

Copies settings

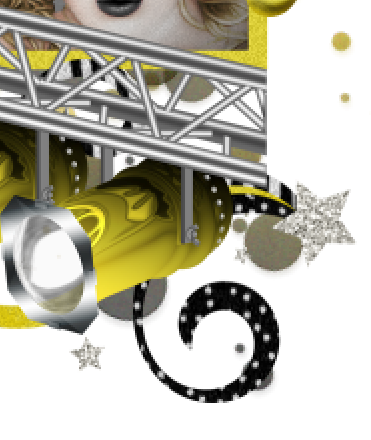
Once happy with the stretch and placement - apply and

move the tube up to the top

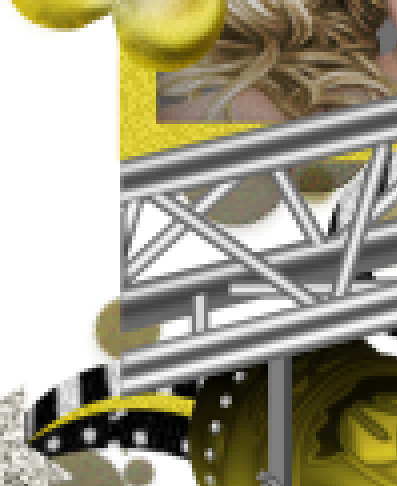
Duplicate the copies layer

Image

Flip


Open the Moon element

Image, Resize, 60%

C&P

Line up with the batwing of the tube to the right of the middle tag canvas

See my tag for ref

Move this moon layer down the LP so it's just above the White Back

Duplicate

and on the bottom copy - Adjust, Blur, Gaussian Blur, 5.00


Open the Bat

Image, Resize 20%

C&P

Place as mine at the top of the tag area


Open the Tombstones

Resize 50%

C&P

Place as mine over to the right

move down the LP so it's below the tube layer


Open the Tree

Resize 80%

C&P

Place as Mine over to the middle right

Position within the LP so it's below the tube layer

but above the two Mura's layers

Reposition the bat layer now if liked


Remember the spare frame layer we had?

Move this right up the Layer Palette so it's at the top

Duplicate once more, and hide one

then

place in the centre of the tag

Now

Mura Meister Copies, and apply these settings


Now position as mine over the moon area

and change the Blend Mode of this layer to

Hard Light

and drop the Opacity of this layer to 50%


and unhide the other frame layer

Image, Resize, 60%

Adjust, Sharpness, Sharpen if needed

Repeat the Copies settings you just applied to the other one

and also apply the same Greytinter settings as we did earlier

And position as mine


Open the Wordart2

Resize 60%

C&P

Place as mine over to the bottom right

and move down below the tube layer


Open Paper 5

Don't resize the paper just

Edit Copy

and then Edit, Paste as a New Layer

Move down below all the layers except the White Background

then

Crop to the current tag canvas size of 700 x 600

and

on this layer, apply my Mask called Vix-BigMask019

Layers, Merge Group and move the mask layer slightly over to the right a little

Duplicate

Image

Flip

and move this down a little so it peeks out from the bottom of the assorted elements and tubes - take care it's not touching the edge of the tag canvas


Activate the tube layer once more

Duplicate

And apply a Gaussian Blur overlay as liked

I used 2.00 blur and Soft Light

and apply Xero Greytinter to the bottom tube copy


Now apply a favourite dropshadow to the elements and tube layer

(don't shadow the framed Mura layers or the wordart -

they were all shadowed already)

I used

-2, 3, 23, 8.91, Black


Now finally

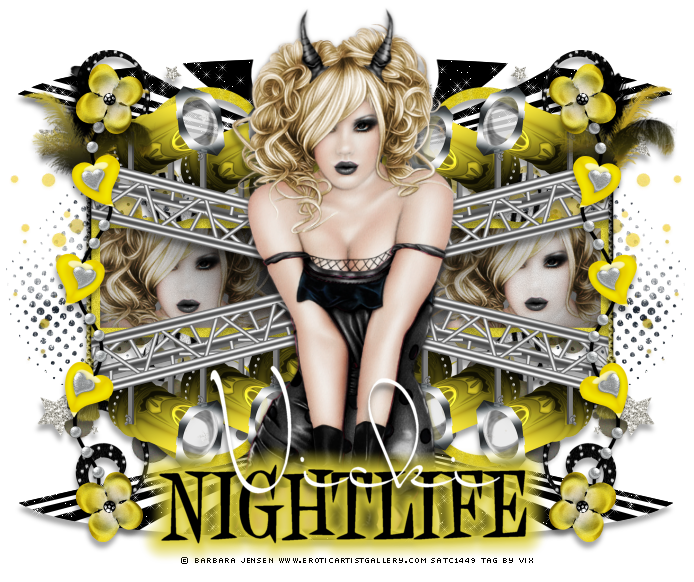
Add your name in a font of choice and finish of choice

Add your copyright information and/or license number

Crop

Delete the White Background

Save as a PNG file

Tag!

Hope you enjoyed this tut xx

This tutorial was written on the 23rd of October 2012 by Vix
It is a tutorial written as I went along this morning
and any potential similarities to other tag tutorials that
may be available is wholly unintended and completely coincidental.
Any items supplied to use to create your own tag with this tutorial are supplied
in good faith - if I have used something not intended
for usage in this way, please contact me via email.
Any items created by me for the purposes of this tutorial MAY NOT be used in
any other tag tutorials or for PSP Supplies you create (wordart, brushes, masks, templates, kits)
Links to tube/scrap blogs or PTU tube sites are added either through necessity or creator courtesy,
and it is entirely up to the individual (ie. You!) if you choose to visit these sites and/or download/purchase from them.
Scraps used in my tutorials that I've obtained from PTU purchased scrap kits are NOT supplied
in my tutorials supplies.
This website is intended for educational/entertainment purposes only
NO linking to my tut examples, screen shots, files or graphics permitted
All of my tutorials are registered with TWI

Tuesday 7 August 2012

Tag Tutorial - PTU - Nightlife


SUPPLIES NEEDED

Tube of Choice - I'm using one of my favourites by Barbara Jensen which you can purchase at SATC

Taggers Scrapkit - Nightlife by Gemini Creationz - which you can purchase from SATC


Xero Graphics

Mura Meister Copies

Xenofex 2

Eye Candy 4000


Although this is a copy and paste style tutorial, experience in using the filters and understanding of PSP layers etc will be required :)

*****************

Open a New Image in PSP - 700 wide by 600 high @ 72dpi

Add a New Layer

Floodfill White

Open the gemini_nightlife_cots file (the dots image)

Resize 50%

Copy

and Paste as a New layer on the tag canvas

And apply Mura Meister Copies on this setting


Now move the layer over to the right of the tag canvas as mine

Duplicate

Image

Mirror

Layers, Merge, Merge Down


Open your chosen tube

Resize as needed then copy and paste

Position centrally to the tag so you know where the

final position will be

Leave for now, we'll adjust it later

So...


Open the gemini_nightlife_fandangle

Image, Resize 50%

Copy and Paste

Place as mine on the top left of the tag area

Right click the layer in the layer palette and

choose Duplicate

then

Image

Flip

Merge these two layers together

Right click and duplicate again

then

Image

Mirror


Now, using your Dropper tool

Select a yellow shade from the yellow area of the fandangle layer

Place this colour in your top box (Foreground) area of your Materials Palette

Have your Background on Nothing

Now, Preset Shape Layer

Look for Rectangle

Set it to Line Style Solid and Width on 10

Now

Using the dotty layer as a guide, draw out your Rectangle - you want it

to be touching the black and white swirls of the fandangle layer

Draw it out and then when you're happy with sizing, Convert to Raster layer

Jiggle to adjust positioning if needed and once happy, move this Rectangle layer

BELOW the merged swirly fandangle layer in the LP

On this rectangle layer

Adjust, Add/Remove Noise

and choose Add Noise

Uniform, 10

Monochrome ticked

OK


Click inside the Rectangle layer using your Magic Wand on the usual settings

which are Add, RGB Value, 0 Tolerance and 0 Feather

So, click inside then Selections, Modify, Expand by 3

Selections, Load/Save Selection and choose SAVE Selection to Alpha Channel

Click Save

Keep Selected

Now add a new Layer just above the dots layer

but below the rectangle layer

and floodfill the selected area with Black

Keep Selected

Add a New Layer

Click on the Airbrush tool

Have it on these settings


Make sure your colour in the Foreground is WHITE

and then click to the top left area of the selected rectangle area

and draw your airbrush down the right, like a single swag finishing behind your tube

Then, over to the top right area of the selection

and swoop back to the left with the airbrush

(You'll end behind your tube each time)

OK?

Hope I explained that clearly :)

So, you should end up with a brush area that almost looks like lit up areas?

Cool!

With your area still selected

Copy and Paste your tube

one to the left and one to the right

and position under the rectangle layer but above the airbrush layer

Selections, Invert and hit Delete on both tube layers

Now

Selections, None for now...and in fact, it turns out we don't need

the saved selection, but never mind eh!

OK

Change the blend mode of both tube layers to Overlay

then

Xero Graphics, Radiance on the default settings

Note:

If you don't like the finished effect on your tube, then don't use the Xeros OR

change the Blend Mode of your tube cutout layers to suit the tube you use


Open the gemini_nightlife_stagelights

Image, Resize, 50%, All Layers Ticked

Copy

Paste this light as a new layer on the tag canvas

Move it below the tube layer

and line up the right side of the lights with the bottom right of the rectangle

Zoom in to see it better and line up like this...


OK

Duplicate this layer

Image

Mirror

Now this one doesn't line up properly so again, zoom in

and line up with the bottom left side of the rectangle...


OK

Now duplicate this layer

Image

Flip

And move this light UP until it "mirrors" the positioning of the lower one

and you can still see the tube underneath

Then

Duplicate this light layer

Image

Mirror

And once more, it's not a perfect mirror, so move this light layer over to the right

so it lines up with the outside of the rectangle area

Phew!! :)

OK, so that's those positioned - if you're happy with the positioning you

can merge those light layers together to one layer


Open the gemini_nightlife_feathertickler

Image, Resize 80%

Copy

Paste as a New Layer on the tag canvas

Move over to the left

Line up with the edges of the rectangle/lights

Duplicate

Move over to the right and line up as mine


Open the gemini_nightlife_halftone

Image

Resize 50%

Copy

Move over to the left side of the tag canvas

Move this layer down the Layer Palette

to just above the White Background layer

Duplicate

Image

Mirror


Open the string_hearts

Image, Resize, 50%

Place as mine over to the left

Duplicate

Image

Mirror

Line up as mine


Open the armina_fabric_flowers6b

Resize this flower image 20% (Image, Resize, 20%, All Layers Ticked)

Copy this image

Paste as a New Layer on your tag canvas

Place it to the left side at the top of the string hearts as mine

Duplicate

Image

Mirror

Layers, Merge, Merge Down

Duplicate

Image

Flip

Adjust if needed


Open the path

Image, Resize, 50%

Copy

and paste as a new Layer

Move over to the right at the bottom of the tag

And move down the Layer Palette so it's just above the Dots layer

See mine for placement

Duplicate

Image

Mirror

Layers, Merge, Merge Down so both paths are on one layer

Duplicate

Image

Flip!

And adjust up or down as needed, if needed


Back to the tube layer (yes, we got there in the end lol!)

Duplicate

And on the top layer

Adjust, Blur, Gaussian Blur 2.00

then

Xero Graphics, Radiance

Apply the default settings

then change the Blend Mode to Soft Light, and then

change the Opacity of this layer to about 60%

On the Bottom tube layer

Add a Dropshadow of


And apply it again (total 2 times)

Now

Right click on the bottom tube layer in the Layer Palette

View, Current Only

then Unhide the upper tube layer

Right click on the Bottom tube layer again and choose, Merge, Merge Visible

You basically want both tube layers merged onto one layer

Done that?

Excellent

OK

So now, click View, All so you can see all the layers again

But hide the Tube layer for now

then

Onto the bottom path layer

Take your Magic Wand and click on all the black areas of the bottom path layer

Once all of them are selected

Selections, Promote Selection to Layer

then

Xenofex 2 Constellation on these settings of mine...


Selections None

Repeat this step for the top path layer


OK

Keep your tube hidden for the moment

Now for your Text tool

Choose the font - I used Desigers on Size 72 and colour Black

Type out the word you'd like

Convert to Raster Layer

Position to compliment the path edge

then

Eye Candy 4000, Gradient Glow on the default setting EXCEPT change the colour to

match the yellow shade we've been using

Apply


OK

At this point, I erased the bottom of my tube which was protuding

I did this using my Selection Tool, on Rectangle with a Feather of 5

Chose the area that I wanted erased

then hit Delete a few times

OK


So now

Apply the dropshadow to all the element layers except the halftone and dots layers

Then

Finally - add your name in a font of choice

I used White, Dr Carbfred and applied the shadow twice

Add your Artist cr info

Delete the White Background layer

Crop to size and save as a PNG

All done! :)

Hope you've enjoyed this tutorial and have fun making your tags xx

*************************

This tutorial was written on the 6th of August 2012 by Vix
It is a tutorial written as I went along this morning
and any potential similarities to other tag tutorials that
may be available is wholly unintended and completely coincidental.
Any items supplied to use to create your own tag with this tutorial are supplied
in good faith - if I have used something not intended
for usage in this way, please contact me via email.
Any items created by me for the purposes of this tutorial MAY NOT be used in
any other tag tutorials or for PSP Supplies you create (wordart, brushes, masks, templates, kits)
Links to tube/scrap blogs or sites are added either through necessity or creator courtesy,
and it is entirely up to the individual (ie. You!) if you choose to visit these sites and/or download/purchase from them.
Scraps used in my tutorials that I've obtained from PTU purchased scrap kits are NOT supplied
in my tutorials supplies.
This website is intended for educational/entertainment purposes only
NO linking to my tut examples, screen shots, files or graphics permitted
All of my tutorials are registered with TWI