
This is a nice, simple copy and paste tag tutorial
It is not taxing on the PSP skills :)
However, it uses a gorgeous kit *wink* and is fab for getting to
know your PSP layers or if you need a tag in a hurry! :D
SUPPLIES NEEDED
Tube - I'm using Merry by Celinart Pin Up which you can get from Scraps and the City HERE
Scrapkit - PTU - A collab by SkyScraps and me called "Christmas Delight"
You can purchase it HERE
Mask by me - it's one of my Christmas Masks from 2008
called Vix_Mask301
and it's available from my tutsite for download if you
don't have it already
Scroll down the page and find them HERE
Xero Graphics - Radiance
Eye Candy Gradient Glow - optional
************
Open a New Image in PSP - 700 x 600
Add New Layer
Floodfill White
Open the file Vix-E3 (The Black frame)
C & P
Position in the centre of the tag canvas
Open the file - SkyScraps-CD-E40 (The Christmas Tree)
Image
Resize
80% Smartsize
Copy
and Paste as a new Layer above the frame layer
Open the file SkyScraps-CD-E21 (the red swirly ribbon)
Image
Resize
50% Smartsize
Copy
and Paste as a new Layer on the right side of the frame
Duplicate
Image
Mirror
Now Move BOTH of these ribbon layers
down the Layer Palette so they're just above the White Background layer
Open my paper Vix-P2 (the green one)
Image
Resize
86%
Copy
and Paste
as a new Layer
Click with your Magic Wand inside both of the frame sections
Selections
Modify
Expand
4
Selections
Invert
and hit Delete on the paper layer
Selections
None
and make sure the Paper layer is above the ribbons and below the frame
Open vix-E29 (the baubles)
Image
Resize
60%
Copy
Paste on the left side of the tag canvas
Line it up to the top of the frame
Duplicate
Image
Mirror
Open the Celine tube
Edit
Copy
Paste as a New Layer
It'll be massive - hooray! lol!!
So place on the left side of the tag canvas
Under the frame layer
Line up as Mine
Use Magic Wand once more - and do the same selection
as before
and hit Delete on the tube layer
Selections
None
In the Layer Palette (the LP) change the Blend Mode of
the tube to Screen and drop the Opacity to 53 or thereabouts
Now
Paste the tube again
And this time
Resize the tube
60%
Move over to the right of the tag canvas (see mine for placement)
and move the tube layer up to the top of the LP
Duplicate the tube layer
on the top copy
Adjust, Blur, Gaussian Blur, 2.00
then
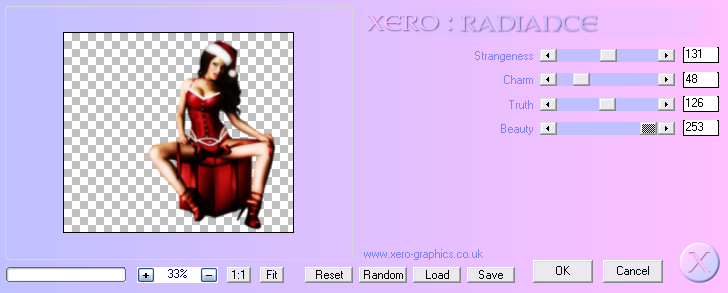
Xero Graphics - Radiance
on these settings
Then change the Blend Mode in the Layer Palette to Soft Light
Open the SkyScraps-CD-pp6 (Paper)
Image
Resize
75%
(So the paper should be 600 x 600 now)
Now
Apply my mask to the Paper
Then
Copy the Masked Paper
Paste as a new layer on the Tag canvas
Place it on the left side just above the White Background
Duplicate
Image
Mirror
Image
Flip
Now open Vix-E41 (the scatter)
Copy
Paste over on the right side
Move in to position as mine
Duplicate
Move that layer over to the left
Move both scatter layers down the LP so
they're just below
the Paper frame fill layer
Open the file Vix-E34 (the holly)
Copy
Place as mine on the left side of the frame
Duplicate
Image
Flip
Make sure both of these layers are
just below the main tube layer in the LP
Open the file Vix-E39S (the shadowed glitter ornament)
Copy
Paste over to the left side of the tag canvas
Move this layer in the LP
down to just above
the Mask layers
Place as mine
Duplicate
Move the duplicate over to the top right as mine
Open the file - Vix-E45 (the Celebrate wordart)
Copy
Paste as a New Layer
just above the ornament layers
and place as mine
Duplicate
and move down to line up with the bottom of the frame
See my tag again for reference :D
OK
Nearly there!
So now
Crop the tag canvas to it's size or smaller if liked
Delete the White Background layer
Apply a favourite drop shadow to any element that
doesn't already have one
I used a subtle one for the holly and ribbons
and a larger one for the frame, tree and bottom tube layer
Now finally
Add your name in a font and style of choice
Shadow it
and then add your Artist Info
Save as PNG
That's it
All done and I hope you enjoy your tag xx