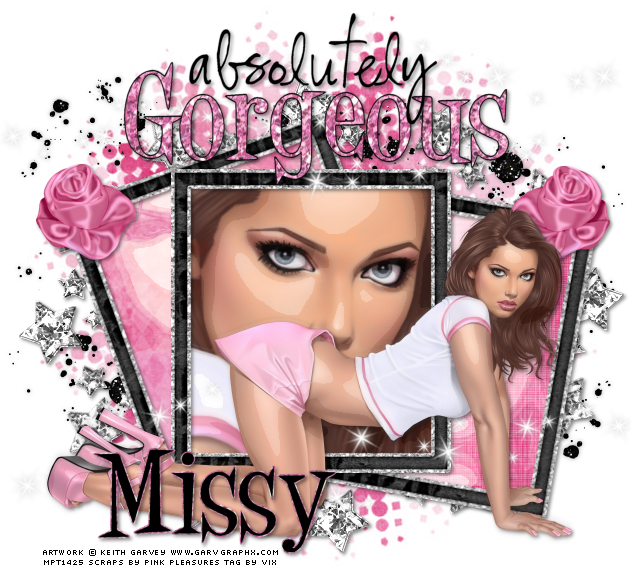
To make this tag, you will need...
Tubes/Close Ups of your choice - I'm using some gorgeous ones by
© Keith Garvey
To purchase Garv's work to use in your own PSP tags - see MPT
Scrapkit - FTU called Rock Baby by Vicki and Tamie @ Pink Pleasures
Absolutely stunning kit, loved it girls, thank you xx
If you download it, please leave a little love
Mask - Vix_Mask147 - available from my tut site HERE
Wordart - by me HERE (Please don't use this for any other purpose
other than your personal tag making - thank you xx)
Mura Meister Copies
Xero Graphics Abstractor
Both these filters are freeware and readily available from the Net
______________________
The Usual
or for a bit of le difference! try 650 x 600
Open ele70 (Black Frame)
Image, Resize 60%
C&P
Place on the tag canvas towards the bottom...ish
See my tag for placement
Open RB_pp2 (Pink Paper)
Image, Resize 85%
C&P
Move down under the Black Frame layer
Duplicate the paper and hide one for now
Click inside the frame with Magic Wand
and do a Selection Delete (Expand by 4)
on one of the papers
Now duplicate the frame layer
and Image, Free Rotate, Left 20 degrees
Move this across so the bottom left corner
lines up with the other bottom left corner on the unrotated one...um...
does that make sense? Hope so, see my tag for ref
And move this rotated one down the Layer Palette
under the Original Frame and paper
Open RB_pp9
Resize as before
C&P
Move down under the rotated frame layer
and do another Selection Delete
Back to the unrotated original frame layer
Duplicate
And on the duplicate
Image, Rotate, Free Rotate 10 degrees to the Right this time
and move it so the bottom left point is just slightly offcentre
to the one underneath (the middle straight one)
Take another paper - you choose this time lol
and Resize and Selection Delete as before
Now move these two down below the straight frame and paper fill
Taking shape!
OK
Unhide the dark pink paper copy
and take a mask of your choice or use my good ol' Mask_147
(It seems to suit a lot of tags and I'm very proud I made it lol!)
Now take your chosen tube/s or close up/s or
a combo of both
I used three close ups for inside the frames
On each one working on the left and right frames
C&P your close up
Place it under the corresponding frame layer
Selection Delete the excess tube
and Apply Xero Abstractor to the tube
(you may need to hit Reset to get it to work when in Xero)
then
Once applied, Change Blend Mode of the tube to Overlay or Soft Light
I used Overlay on my two tubes
then
On the central frame
I used a close up of the main tube I'm going to use
C&P
Selection Delete as before
But this time
Duplicate the tube
Adjust, Blur, Gaussian Blur, 2.00
and then
Apply Abstractor to the top tube
and drop the opacity of this top layer to 30 or thereabouts
(Additional, if like mine you're using the actual tube too, C&P
and place that now so you can see what you're doing)
I duplicated, blurred and abstracted that one too :)
Then add a favourite dropshadow to the main tube if using one
I used my usual at the moment - 2, 2, 45.00, 5.00, Black
Now then, back to the scrapkit for some more elements...
RB_ele49 (white sparkles)
C&P
Move to the top of tag and line up (see mine for ref)
Duplicate
Image
Flip
Jiggle them around to get your prefered placement
(You may need to hide the White Back for the mo, to see what you're doing)
Open RB_ele2 (pink satiny rose)
Image, Resize 25%
C&P
Place on the left frame (see mine for ref)
Duplicate
Image
Mirror
Open RB_ele35 (black glitter splat)
C&P
Move it over to the left of the tag and line up as mine
Duplicate
Image
Mirror
Image
Flip
Move these two layer down the Palette to just above the mask
RB_ele62 (the diamond stars)
Image, Resize 25%
C&P
Move to the centre of the middle frame layer
Mura Meister Copies
Encircle
But change the Shift X slider to 80
and
the Shift Y slider to 65
Apply
and if needed, Adjust, Sharpness, Sharpen
and move down the Layer palette to just above the Black glitter splats
Open the Wordart I've provided for this tut
C&P
Place where you'd prefer it to go or where I've got mine :)
Now, add shadow of 2, 2, 45.00, 5.00 Black to
all the frames, the elements - except the sparkles, glitter splats
and mask layer
But, on the Glitter Splats layers - add a 0, 0, 35.00, 7.00 Black dropshadow
on the Sparkles layer, 0, 0, 20, 5.00 Black dropshadow
and No shadow on mask layer!
Finally, add your name in a font and style of your choice
Add your copyright and artist info
Crop the tag canvas
and
Delete the White background and save as transparent .PNG